
 2025/10/23
In scientific imaging, capturing accurate and reliable images is critical. From life science cameras used in fluorescent microscopy to astronomy cameras for deep-sky imaging, even minor artifacts can compromise results. One common issue is hot pixels, which appear as bright spots on the sensor.
One common phenomenon that can affect image quality is the appearance of hot pixels. These bright spots, seemingly appearing out of nowhere, can compromise the integrity of your data if not properly understood and managed. In this article, we’ll explore what hot pixels are, why they appear, and the most effective strategies for managing them.
What Are Hot Pixels?
Figure 1: Hot pixels
Hot pixels are pixels that are significantly brighter than their neighbors, typically caused by thermal noise (dark current) in pixels containing defects.
Hot pixels are pixels that exhibit unusually high dark current compared to their neighbors and the sensor as a whole. These are typically caused by physical defects within the pixel. They are mostly static, and will be in the same place from image to image, though their value will vary from frame to frame, and can in some cases ‘blink’ between higher and lower value states. It is also possible to have hot pixels that are signal-level-dependent, only showing at a certain light level.
Their contribution can be significantly reduced with camera cooling, though as with dark current in general, the presence and extent of hot pixels depends strongly upon the sensor architecture and engineering.
The presence or absence of hot pixels on a sensor is seldom characterized or demonstrated on camera specifications sheets. For uncooled cameras or applications requiring long (over 1 second) exposure times, it is advisable to test a camera to check for hot pixels. This can be done by examining images captured at the intended experimental exposure times with no light impacting the camera.
Why Hot Pixels Appear
Several factors contribute to the formation of hot pixels, and understanding these causes is crucial for both prevention and correction.
1. Thermal Effects
Temperature plays a significant role in the behavior of camera sensors. Hot pixels are closely related to dark current, which is the small electric current generated by a sensor even in the absence of light. Dark current increases exponentially with temperature. The higher the sensor temperature, the more likely certain pixels are to produce excessive charge, leading to visible hot pixels in your images.
2. Sensor Defects
Even high-quality sensors can have manufacturing imperfections. Tiny inconsistencies in the semiconductor material or slight irregularities in the photodiode can result in certain pixels being more prone to generating excess charge. These defective pixels often manifest as hot pixels under normal imaging conditions, especially when exposed to heat or prolonged use.
3. Aging and Sensor Wear
Like any electronic device, camera sensors degrade over time. Prolonged exposure to heat, light, and electrical currents can cause new hot pixels to emerge as the sensor ages. While the appearance of hot pixels is common in older cameras, it can also be monitored and mitigated to maintain image quality.
4. Long Exposure Times
Hot pixels are especially noticeable in long-exposure imaging. In these cases, individual pixels accumulate charge over time. If a pixel has a higher-than-normal dark current, this accumulated charge can become visible as a bright spot. Applications such as astrophotography, luminescence imaging, and long-duration microscopy are particularly susceptible to hot pixel artifacts due to extended exposure periods.
How Hot Pixels Affect Scientific Imaging
The presence of hot pixels can significantly affect the quality of scientific images. While a few isolated bright pixels may seem trivial, their impact becomes more pronounced in precise measurements, low-light imaging, or when capturing subtle signal variations.
1. Image Artifacts
Hot pixels appear as bright spots in dark areas of an image, creating artifacts that do not correspond to real features. In quantitative imaging, these artifacts can be misleading, potentially leading to false positives or misinterpretation of experimental results.
2. Noise Amplification
Hot pixels contribute to overall sensor noise, particularly in long-exposure or high-sensitivity settings. For example, in fluorescence microscopy, where signals are already weak, hot pixels can interfere with accurate signal quantification.
3. Challenges in Post-Processing
Although post-processing software can correct hot pixels, excessive or uncorrected hot pixel artifacts complicate image analysis. For example, automated image segmentation algorithms may mistakenly identify hot pixels as real features, leading to inaccurate measurements.
Identifying Hot Pixels
Identifying hot pixels is a critical first step toward managing them effectively. Fortunately, several methods exist:
1. Capturing Dark Frames
A dark frame is an image captured with the camera sensor exposed but with no light reaching it, often by covering the lens or shuttering the camera. Hot pixels stand out clearly in dark frames as isolated bright points. Capturing multiple dark frames at the same temperature and exposure settings used in your experiments can help map and monitor hot pixels.
2. Software Tools
Many scientific cameras and imaging software packages include built-in tools to identify and highlight hot pixels automatically. These tools often generate a hot pixel map, which can be applied during image acquisition or post-processing to correct affected pixels.
3. Manual Inspection
For small-scale imaging setups or infrequent hot pixel issues, manually reviewing dark frames can be sufficient. Look for bright spots that appear consistently across frames, as these are likely hot pixels rather than random noise.
Methods to Manage Hot Pixels
While hot pixels cannot always be completely eliminated, there are several effective strategies to manage them and minimize their impact on scientific imaging.
i) Camera Cooling
One of the most effective ways to reduce hot pixels is through sensor cooling. Cooling lowers the sensor temperature, which directly reduces dark current—the small electrical current generated by the sensor even in complete darkness—and, consequently, the occurrence of hot pixels. This is particularly important for long-exposure applications such as astrophotography, luminescence imaging, and low-light microscopy, where thermal noise can dominate the signal.
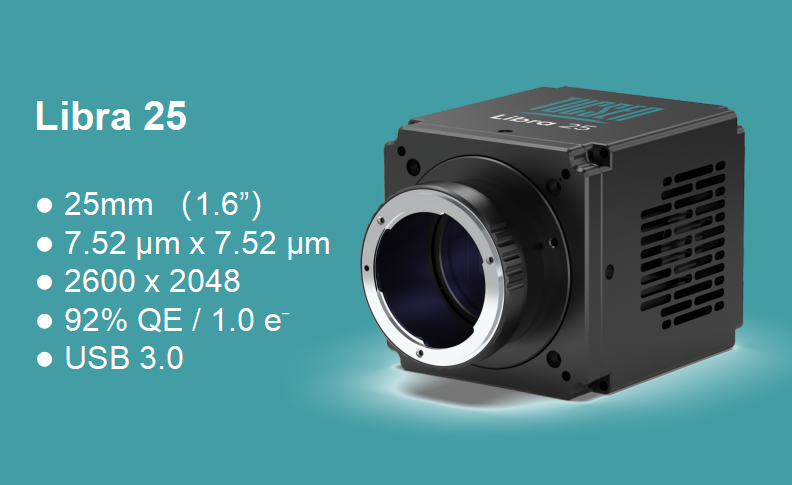
Cooled cameras help minimize thermal noise, which directly reduces hot pixel formation. Tucsen Libra 25 Large Format Cooled CMOS Camera, for example, maintains a low sensor temperature that significantly limits dark current, allowing long-exposure imaging with minimal hot pixel artifacts.
ii) Software Correction
Software-based solutions are widely used to correct hot pixels and improve image quality.
● Dark Frame Subtraction: This method involves capturing a dark frame and subtracting it from your actual image, effectively removing the contribution of hot pixels.
● Hot Pixel Mapping: Modern cameras often include hot pixel maps that track defective pixels over time. When applied, the camera software automatically corrects or interpolates over these pixels.
● Post-Processing Tools: Image analysis software, such as Mosaic Software, allows users to identify and correct hot pixels in post-processing, either through interpolation or pixel replacement.
With these tools, researchers can ensure cleaner, more accurate images without compromising critical data.
iii) Shorter Exposures and Averaging
Reducing exposure times can minimize the accumulation of excess charge in hot pixels. When long exposure is necessary, capturing multiple shorter exposures and averaging them can help reduce the visibility of hot pixels while preserving the desired signal.
iv) Sensor Maintenance and Replacement
In rare cases where hot pixels become excessive due to sensor damage or age, it may be necessary to consider sensor repair or replacement. Regularly monitoring sensor performance and maintaining optimal operating conditions can prolong sensor life and minimize the development of new hot pixels.
Best Practices for Minimizing Hot Pixel Impact
● Regularly Capture Dark Frames: Frequent dark frame acquisition allows you to track hot pixel development and apply corrections effectively.
● Use Appropriate Cooling: For long-exposure imaging, cooled cameras help control thermal noise.
● Optimize Exposure Settings: Balance exposure time and signal requirements to minimize hot pixel visibility.
● Update Software and Firmware: Camera manufacturers often release updates that improve hot pixel correction algorithms.
● Monitor Sensor Age and Usage: Be aware that older sensors may produce more hot pixels; plan for maintenance or replacement as needed.
Conclusion
Hot pixels are an inherent characteristic of digital camera sensors, especially in scientific imaging applications where precision and low-light sensitivity are critical. They arise from a combination of thermal effects, sensor imperfections, aging, and long exposure times. While their presence cannot be entirely avoided, understanding their causes and implementing effective management strategies—such as camera cooling, dark frame subtraction, and hot pixel mapping—can significantly reduce their impact.
By proactively monitoring and correcting hot pixels, researchers can ensure that their images remain accurate and reliable, preserving the integrity of experimental results. For those seeking high-performance imaging solutions, Tucsen offers a range of advanced scientific cameras and software. Contact us to achieve the clearest possible images and enhance the quality of your scientific research.
Tucsen Photonics Co., Ltd. All rights reserved. When citing, please acknowledge the source: www.tucsen.com


